With the rapid evolution of the Python ecosystem, many traditional tools (like pip, virtualenv, flake8) are being replaced by more modern and efficient alternatives. This article introduces a modern Python development setup designed to improve efficiency, code quality, and performance.
1. Foundation: IDE
1.1 VS Code Extensions and Configuration
VS Code is currently the most popular tool for Python development. First, download it from the official VS Code website.
Configuration Tip: It is recommended to uncheck the following options to avoid conflicts with modern tools:

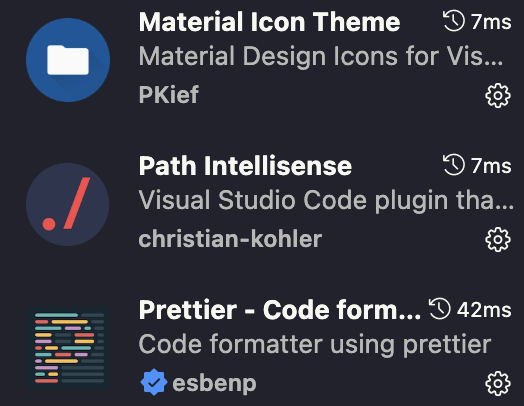
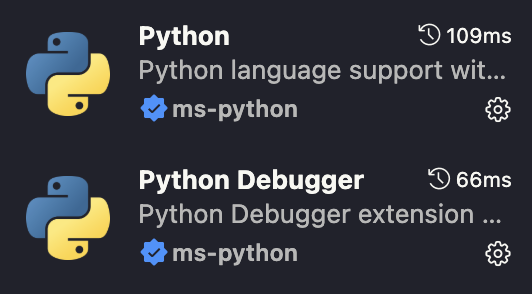
Recommended Extensions: Install these for the best experience:


1.2 AI Programming Tools
- Cursor: A smart editor with deep AI integration. Configuration is compatible with VS Code. Highly recommended.
- Trae: An AI programming tool developed by ByteDance, currently in active development.
2. Infrastructure: uv
2.1 Introduction to uv
uv is an extremely fast Python package installer and resolver, developed by Charlie Marsh,
the creator of Ruff, and backed by Astral. Think of it as a high-performance replacement for pip and pip-tools, designed to solve the long-standing speed and performance issues in Python package management.
Installation (via curl recommended):
# macOS / Linux
curl -LsSf https://astral.sh/uv/install.sh | sh
Quick Start:
# 1. Create and enter project directory
mkdir my-python-project
cd my-python-project

# 2. Create virtual environment with uv (defaults to .venv directory)
uv venv

# 3. Activate the virtual environment
source .venv/bin/activate
# Windows users: .venv\Scripts\activate
2.2 Why uv Emerged
1. Unified Toolchain
uv's core philosophy is to consolidate multiple scattered tools into one. Before uv, a typical Python project might need:
python -m venv .venv: Create virtual environmentspip: Install packagespip-tools: Resolve and lock dependencies fromrequirements.intorequirements.txtpipx: Install and manage global CLI tools
uv integrates all these features into a single binary. You can use uv venv, uv pip install, uv pip compile, uv tool install and other subcommands to accomplish everything. This greatly simplifies tool management and project configuration.
2. Global Cache
This is the ultimate secret to uv's speed. When you first install a package (e.g., pandas==2.2.0), uv will:
- Download the wheel file.
- Extract it to a globally shared, version and platform-specific cache directory.
When you install the same version of pandas again in any project, uv won't re-download or extract. Instead, it creates hard links (or copies on unsupported systems) from the cache to your virtual environment. This process is nearly instantaneous.
- Key Point: The cache is global, benefiting all
uv-managed projects. - Related Commands:
uv cache dir: View cache directory location.uv cache clean: Clear the cache.
3. High-Performance Resolver
Dependency resolution finds compatible version sets for all packages including sub-dependencies. pip's traditional resolver is slow, especially with complex dependencies.
uv uses a high-performance Rust-based resolver with these characteristics:
- Massive Parallelism: Fetches metadata for all top-level dependencies simultaneously.
- Efficient Version Selection: Quickly finds version combinations satisfying all constraints.
This means even with complex pyproject.toml or requirements.in files, uv pip compile generates precise, reproducible requirements.txt lock files in minimal time.
2.3 Common Operations
uv venv                     # Create environment
uv venv my-env -p 3.11      # Specify environment name and Python version
uv venv -p python@3.11      # Use python3.11 to create .venv
source .venv/bin/activate   # Activate environment (still required)
uv init                     # Initialize uv project
uv pip install              # Install packages
uv add                      # Add packages to project
uv sync                     # If pulling a uv project, sync to set up environment
uv pip freeze > requirements.txt # Generate list of installed packages with exact versions
2.4 Advanced Usage
1. Dependency Resolution and Locking
Replace pip-tools by generating a locked requirements.txt from requirements.in.
uv pip compile requirements.in -o requirements.txt2. Global Tool Installation
Replace pipx:
# Install tools
uv tool install ruff
uv tool install black --python python3.11  # Specify Python version

# Manage tools
uv tool list         # List all installed tools
uv tool uninstall ruff # Uninstall tool
uv tool run black .  # Run tool without activating environment
2.5 Essential Knowledge: pyproject.toml
What is pyproject.toml?
pyproject.toml is a unified Python project configuration file introduced by PEP 518 and extended by subsequent PEPs.
Its core goal is to solve configuration chaos. Before it, a project might contain setup.py, setup.cfg, requirements.txt, MANIFEST.in, and various tool config files (.flake8, .coveragerc, mypy.ini, etc.).
pyproject.toml uses TOML format, aiming to be the single entry point for all configurations, making project structure cleaner and more standardized.
What Problems Does It Solve?
It mainly solves two pain points from the setup.py era:
- Missing Static Metadata:
setup.pyis an executable Python script. Without running it, you can't determine build-time dependencies. This creates a chicken-and-egg paradox. - Scattered Configuration: Project configs spread across dozens of files, hard to manage.
pyproject.toml solves both with a static, declarative file.
Structure of pyproject.toml
The file consists of multiple "tables" denoted by [table_name]. Three main categories:
[build-system]: Defines the project's build system.[project]: Defines core metadata (package name, version, dependencies, etc.).[tool.*]: Configures third-party tools (uv,ruff,mypy,pytest, etc.).
1. [build-system] Table
Tells packaging tools (like pip) how to build your project.
[build-system]
# --- Declare build-time dependencies ---
requires = ["setuptools>=61.0"]
# --- Specify the build backend ---
build-backend = "setuptools.build_meta"requires: Dependencies needed to build your package. Common ones:setuptools,hatchling,flit_core,poetry-core.build-backend: Python object that knows how to build your package.
2. [project] Table
The project's "ID card", standardized by PEP 621.
[project]
name = "my-package"
version = "0.1.0"
description = "A short description of my project."
readme = "README.md"
requires-python = ">=3.9"
license = { file = "LICENSE" }

authors = [
  { name = "Your Name", email = "your.email@example.com" },
]

keywords = ["packaging", "python", "example"]

# --- Core dependencies ---
dependencies = [
  "httpx",
  "rich>=13.0.0",
  'tomli; python_version < "3.11"',
]

# --- Optional dependencies ---
[project.optional-dependencies]
test = ["pytest", "pytest-cov"]
dev = [
  "my-package[test]",
  "ruff",
  "mypy",
]

# --- CLI script entry points ---
[project.scripts]
my-cli = "my_package.cli:main"

# --- Project URLs ---
[project.urls]
Homepage = "https://github.com/user/my-package"
Repository = "https://github.com/user/my-package"
3. [tool.*] Tables
One of pyproject.toml's most powerful features: unified configuration for all development tools. Each tool defines its own table as [tool.toolname].
# --- uv configuration ---
[tool.uv.pip]
extra-index-url = "https://my-private-registry.com/simple"

# --- ruff (linter/formatter) configuration ---
[tool.ruff]
line-length = 88
target-version = "py311"

[tool.ruff.lint]
select = ["E", "F", "I"]
ignore = ["E501"]

[tool.ruff.lint.isort]
known-first-party = ["my_package"]

# --- mypy (type checker) configuration ---
[tool.mypy]
python_version = "3.11"
warn_return_any = true
ignore_missing_imports = true
Complete Example
# pyproject.toml

# 1. Build system configuration
[build-system]
requires = ["hatchling"]
build-backend = "hatchling.build"

# 2. Project core metadata
[project]
name = "data-analyzer"
version = "1.0.0"
description = "A tool for analyzing data sets."
readme = "README.md"
requires-python = ">=3.9"
license = { text = "MIT" }
authors = [{ name = "Data Team", email = "data@example.com" }]

dependencies = [
  "pandas>=2.0.0",
  "numpy",
  "matplotlib",
]

[project.optional-dependencies]
dev = [
  "pytest",
  "ruff",
  "uv >= 0.1.0",
]

[project.scripts]
analyze = "data_analyzer.main:run"

[project.urls]
Repository = "https://github.com/example/data-analyzer"

# 3. Third-party tool configuration
[tool.ruff]
line-length = 99
select = ["E", "F", "W", "I", "N", "D"]
ignore = ["D100", "D104"]

[tool.pytest.ini_options]
minversion = "6.0"
addopts = "-ra -q"
testpaths = ["tests"]
Summary
pyproject.tomlis the modern Python project configuration standard.- Uses TOML format, clear structure, declarative rather than executable.
[build-system]defines how to build the project.[project]defines what the project is, the metadata center.[tool.*]lets you centralize all toolchain configuration.
For any new Python project, prioritize using pyproject.toml as the sole configuration file.
2.6 uv vs Conda
| Feature | uv | Conda |
|---|---|---|
| Speed | ⚡ Extremely fast | Slow |
| Ecosystem | PyPI (Python-first) | conda-forge (cross-language) |
| Non-Python Dependencies | ❌ | ✅ |
| CUDA/MKL Optimization | System-dependent | Built-in support |
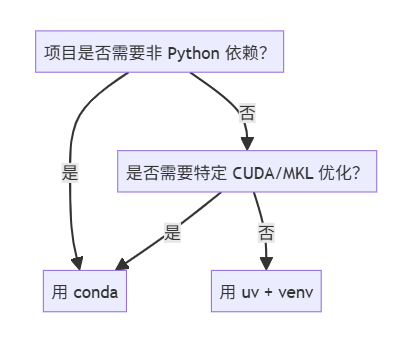
| Right for you? | ✅ Most AI/simulation projects | Only when needing conda-exclusive packages |
🚀 Trend: With tools like uv and pixi (Rust-based conda alternative) emerging, pure Python projects are rapidly shifting to uv, while conda still dominates scientific computing with heavy dependencies.
2.7 Best Practices
- Declare: Declare direct dependencies in a source file (recommend
pyproject.toml). This is your "dependency source of truth". - Lock: Use
uv pip compileto resolve declarative dependencies into a lock file containing all packages with exact versions. - Sync: Use
uv pip syncto install dependencies from the lock file. This ensures your virtual environment is exactly consistent with the lock file.
| Scenario | ✅ Recommended | ❌ Avoid |
|---|---|---|
| Dependency Declaration | Manage all dependencies in pyproject.toml |
Multiple requirements.in or manual editing |
| Install Dependencies | Use uv pip sync -r <lockfile> |
Use pip install -r directly |
| Update Dependencies | Modify pyproject.toml → uv pip compile → uv pip sync |
Manually edit requirements.txt |
| Global Tools | Use uv tool install |
Use sudo pip install or pip install --user |
| Team Collaboration | Commit lock files (*.txt) to Git |
Commit .venv directory to Git |
3. Standards: Ruff
3.1 Why Ruff Emerged
Before Ruff, a standard project might need these tools:
Flake8: Code style and logic error checking.pycodestyle,pyflakes: Flake8's core plugins.isort: Import statement sorting.pylint: Stricter, configurable linter.pyupgrade: Auto-upgrade Python syntax.autoflake: Remove unused imports.black: Code formatting.
Ruff aims to replace all of the above. Install and configure just ruff to get most of these features. This greatly simplifies dependency management and configuration.
3.2 Introduction to Ruff
Ruff is a blazing fast Python Linter and Formatter written in Rust.
Its core mission is to replace the scattered tools Python developers previously had to install and configure. It integrates linting, formatting, import sorting, and syntax upgrades into a single lightning-fast binary.
Core Advantages
1. Extreme Speed
Ruff's most notable feature. Being Rust-compiled rather than Python-interpreted avoids interpreter startup overhead and better utilizes multi-core CPUs for parallel processing.
- Quantified: Ruff typically runs 10 to 100 times faster than tools it replaces (Flake8 + plugins, isort, pylint).
- Practical Impact:
- In CI/CD, code checking shrinks from minutes to seconds.
- In local development, feedback is instantaneous with no delay.
2. Built-in Auto-fix (--fix)
Ruff doesn't just find problems—it auto-fixes many. Its auto-fix is powerful and safe:
- Auto-sort
importstatements. - Remove unused imports and variables.
- Auto-upgrade to modern Python syntax.
- Fix many code style issues.
Main Features
1. Linter (ruff check)
Ruff's core feature. Contains hundreds of rules from popular tools, selectable by rule codes.
Fprefix: FromPyflakes(logic errors)E,Wprefix: Frompycodestyle(code style)Iprefix: Fromisort(import sorting)Dprefix: Frompydocstyle(docstrings)UPprefix: Frompyupgrade(syntax upgrades)
2. Formatter (ruff format)
A newer feature, designed as a high-performance black replacement.
- Compatibility Goal: Produces output nearly identical to
blackwith default config. - Performance:
ruff formatis much faster thanblack.
3.3 Common Operations
| Task | Command |
|---|---|
| Format my code | ruff format . |
| Check code and auto-fix | ruff check . --fix |
| Verify formatting in CI/CD | ruff format . --check |
| Check code quality in CI/CD | ruff check . |
| Real-time checking during dev | ruff check . --watch |
| Understand a rule | ruff rule <RULE_CODE> |
| Clean cache | ruff cache clean |
| Ultimate cleanup | ruff format . && ruff check . --fix |
3.4 Advanced Usage
1. Enable Preview Features
Many powerful Ruff features are in preview mode, requiring explicit enabling:
[tool.ruff]
preview = true
Or via command line:
ruff check --preview .
ruff format --preview .
💡 Tip: Enable preview = true for new projects to get latest rules and fixes.
2. Type-Aware Linting
Ruff in preview mode supports lightweight type inference to enhance rule judgment.
RUF014: Redundantisinstance(x, str)(whenx: stris known)RUF015: Invalidassert isinstance(...)(type already determined)
⚠️ Note: Ruff doesn't replace Pyright/mypy, only uses type info to enhance lint rules. Pair with Pyright for complete type checking.
3. Fine-grained Rule Control (Per-File / Per-Line)
(a) Ignore Specific Files/Directories
[tool.ruff.lint]
extend-exclude = [
  "migrations/",
  "legacy_code.py",
  "scripts/temp_*.py"
]
(b) Enable/Disable Rules Per File
[[tool.ruff.lint.per-file-ignores]]
"tests/**.py" = ["S101", "D"]  # Ignore asserts and docstring rules
"scripts/*.py" = ["T20"]       # Ignore print warnings
(c) Inline Ignore
x = 1  # noqa: E741  # Allow ambiguous variable names 'l', 'O', 'I'
print("debug")  # noqa: T201, T203
4. Custom Rule Priority and Safe Fixes
[tool.ruff]
fix = true
unsafe-fixes = false # Don't apply fixes that might change semantics- Safe fixes: Renaming, format adjustments, removing unused imports, etc.
- Unsafe fixes: Logic changes (like
==→is), rewriting expressions, etc.
🛡️ Keep unsafe-fixes = false in CI to avoid unexpected behavior changes.
5. Deep Editor Integration (VS Code)
Recommended VS Code settings (settings.json):
{
  "python.linting.enabled": false,
  "ruff.enable": true,
  "ruff.args": ["--preview"],
  "editor.formatOnSave": true,
  "[python]": {
    "editor.defaultFormatter": "charliermarsh.ruff"
  }
}
✅ With this, Ruff provides both linting + formatting—no need for Black or Flake8.
6. CI/CD Integration Best Practices
GitHub Actions example:
- name: Run Ruff
  run: |
    pip install ruff
    ruff check . --output-format=github
ruff format . --check # Verify formatting--output-format=github: Show annotations directly in PRsruff format --check: Ensure code is formatted (without modifying files)
7. Migrating Existing Projects (from Black + Flake8 + isort)
| Original Tool | Ruff Equivalent |
|---|---|
| Black | ruff format |
| Flake8 | ruff check (E/W/F) |
| isort | ruff check (I) |
| pyupgrade | ruff check (UP) |
| autoflake | ruff check --fix |
Migration Steps:
- Install Ruff:
pip install ruff - Generate initial config:
ruff migrate(experimental, or configure manually) - One-command format+fix:
ruff check --fix . && ruff format . - Remove old tool dependencies
3.5 pyproject.toml Configuration
[build-system]
requires = ["setuptools>=61.0", "wheel"]
build-backend = "setuptools.build_meta"

[project]
name = "my_project"
version = "0.1.0"
description = "A modern Python project"
dependencies = []
requires-python = ">=3.10"

# ==============================
# 🛠️ Ruff Config (Lint + Format)
# ==============================
[tool.ruff]
preview = true
target-version = "py310"
fix = true
unsafe-fixes = false
line-length = 88

extend-exclude = [
  ".git",
  "__pycache__",
  "venv",
  ".venv",
  "build",
  "dist",
  "notebooks",
]

# ==============================
# 🔍 Lint Rules Config
# ==============================
[tool.ruff.lint]
select = [
  "E", "W", "F",
  "I",
  "UP",
  "C4",
  "TID",
  "ARG",
  "PTH",
]

ignore = [
  "E501",
  "D",
]

[[tool.ruff.lint.per-file-ignores]]
"tests/**.py" = ["S101", "ARG", "PLR0913"]
"scripts/*.py" = ["T20"]

# ==============================
# 🧹 isort Config (Ruff built-in)
# ==============================
[tool.ruff.lint.isort]
known-first-party = ["my_project"]
combine-as-imports = true
force-sort-within-sections = true

# ==============================
# ✨ Formatter Config (Black replacement)
# ==============================
[tool.ruff.format]
preview = true
quote-style = "single"
skip-magic-trailing-comma = false
line-length = 88
indent-width = 4

# ==============================
# 🔤 Pyright Config (Type Checking)
# ==============================
[tool.pyright]
typeCheckingMode = "basic"
pythonVersion = "3.10"
include = ["src", "tests"]
exclude = [
  "**/node_modules",
  "**/__pycache__",
  ".venv",
  "venv",
  "build",
  "dist",
  "notebooks",
]
reportMissingTypeStubs = "none"
reportUnusedImport = "warning"
reportUnusedVariable = "warning"
3.6 Best Practices
- Use
pyproject.tomlexclusively for configuration
Abandon separate config files (.isort.cfg,.flake8). Centralize all Ruff config in[tool.ruff]. - Specify target Python version (
target-version)
The most important yet often overlooked setting. Ensures Ruff applies rules matching your project environment.[tool.ruff] target-version = "py311" - Start with a solid baseline rule set
Don't try to enable everything at once. A sensible starting point includes widely-accepted, high-impact rules.[tool.ruff] # E: pycodestyle errors, F: Pyflakes logic errors, I: isort import sorting, UP: pyupgrade syntax upgrades select = ["E", "F", "I", "UP"] - Embrace auto-fix (
--fix)
Makeruff check . --fixyour standard operation. Ruff's auto-fix is safe and reliable.
4. Types: Pyright
4.1 Introduction to Pyright
- Pyright is a static type checker developed by Microsoft, specifically targeting Python's type annotations (PEP 484, PEP 561, etc.).
- Written in TypeScript, extremely fast (much faster than
mypy). - Integrated in VS Code's Pylance extension, so if you use VS Code, you're likely already using Pyright.
4.2 Pyright Features
- Blazing Fast — Several times faster than mypy for incremental analysis of large projects
- Superior Type Inference — Automatically deduces types from code context
- Strict Mode Support — Enforces type annotations, catching stragglers
- Cross-platform — Can run standalone as CLI (
pyright) or integrate into CI/CD
4.3 Installation
1. Global Installation (via npm)
npm install -g pyright2. Project Configuration
Add pyrightconfig.json to project root:
{
  "include": ["src"],
  "exclude": ["tests", "build"],
  "reportMissingImports": true,
  "reportUnusedVariable": "warning",
  "typeCheckingMode": "strict"
}
4.4 Pyright vs Mypy
| Feature | Pyright | Mypy |
|---|---|---|
| Performance | 🚀 Extremely fast | 🐢 Slow |
| IDE Integration | Perfect with VS Code/Pylance | Better with PyCharm |
| Type Inference | Smarter | Relies more on explicit annotations |
| Community | Newer but growing fast | Established, good compatibility |
| Configuration | Simple | Flexible but complex |
5. Gatekeeper: pre-commit
5.1 Introduction
First, understand that "pre-commit" has two meanings:
- Git's Own Hook: Git provides a "hooks" mechanism allowing custom scripts on specific Git events.
pre-commitis one such hook, triggered aftergit commitbut before the commit object is created. If the hook script exits with non-zero status, the commit is aborted. pre-commitFramework: A Python tool (framework) calledpre-commit. Usually when we saypre-commit, we mean this framework. It greatly simplifies managing and using Git hooks.
Simply put: The pre-commit framework leverages Git's pre-commit hook feature and makes it extremely powerful and easy to manage.
5.2 Benefits
- Automated Code Quality: Transforms linting and formatting from "developers must remember to do" to "automatically enforced". No one will forget to run
ruffbefore committing. - Team Consistency: The config file (
.pre-commit-config.yaml) is committed to version control. Everyone uses exactly the same tool versions. - Shift Left: Catches problems before they enter the codebase. Much more efficient than discovering issues during code review or CI/CD.
- Simplified Onboarding: New team members don't need to manually install a series of tools. Just install
pre-commitand runpre-commit install.
5.3 Common Operations
| Purpose | Command | Notes |
|---|---|---|
| First-time hook install | pre-commit install |
Once per developer/project |
| Daily commits | git commit |
Triggers automatically |
| Check all files | pre-commit run --all-files |
Project init or CI use |
| Check staged files | pre-commit run |
Manual trigger on staging area |
| Update tool versions | pre-commit autoupdate |
Keep hooks current |
| Fix broken environment | pre-commit clean |
Clear cache, solve issues |
| Emergency skip | git commit --no-verify |
Use sparingly! Bypasses hooks |
5.4 .pre-commit-config.yaml Configuration
Core Purpose
.pre-commit-config.yaml is a declarative YAML config file telling the pre-commit framework:
- Where: Which repository to fetch tools from.
- What: Which specific hook to run.
- How: With what arguments.
Top-level Structure
# Core content: list of repository configs
repos:
  # ... first repo config ...
  # ... second repo config ...
repos: Core Config Block
repos is a list. Each repo config contains:
repo: (Required) Repository URL containing hooks.rev: (Required) Git revision to use. Must be a fixed version number.hooks: (Required) List defining which hooks to enable from thisrepo.
Complete Example
# .pre-commit-config.yaml

minimum_pre_commit_version: '2.9.0'

repos:
-   # Repo 1: Official pre-commit general hooks
    repo: https://github.com/pre-commit/pre-commit-hooks
    rev: v4.6.0
    hooks:
    -   id: trailing-whitespace      # Remove trailing whitespace
    -   id: end-of-file-fixer        # Ensure newline at end of file
    -   id: check-yaml               # Check YAML syntax
    -   id: check-json               # Check JSON syntax
    -   id: check-toml               # Check TOML syntax
    -   id: check-added-large-files  # Prevent large file commits (>5MB)
        args: ['--maxkb=5120']

-   # Repo 2: Ruff - High-performance Linter and Formatter
    repo: https://github.com/astral-sh/ruff-pre-commit
    rev: v0.5.0
    hooks:
    -   id: ruff
        args: [--fix]
    -   id: ruff-format

-   # Repo 3: TruffleHog - Prevent secret leaks
    repo: https://github.com/trufflesecurity/trufflehog
    rev: v3.77.1
    hooks:
    -   id: trufflehog
        name: TruffleHog - Scan for secrets

-   # Repo 4: Local hook for project's own Mypy
    repo: local
    hooks:
    -   id: mypy
        name: mypy
        entry: mypy .
        language: system
        types: [python]
        args: ["--ignore-missing-imports"]
        require_serial: true
Explanation:
- First
repo: Includes language-agnostic, general file checks. - Second
repo: Includesruffwith auto-fix (--fix). - Third
repo: Uses TruffleHog to prevent secret leaks. - Fourth
repo(local):repo: localmeans the hook runs from local environment.language: systemtellspre-committo usemypyfrom the current activated virtual environment.
6. Enhancement: Rich
6.1 Introduction to Rich
rich is a Python library for creating rich text and beautiful formatted output in terminals. It makes your command-line interface (CLI) applications more attractive and readable.
Core Advantages
- Easy to Use:
rich's API is intuitive and Pythonic, easy to learn. - Feature-rich: Supports colors, styles, tables, progress bars, Markdown, syntax highlighting, beautiful tracebacks, and more.
- Cross-platform: Works well on Windows, macOS, and Linux.
- Automatic: Auto-detects terminal width and wraps text, intelligently handles overflow.
6.2 Installation
uv pip install rich6.3 Core Features
1. Console Object and print Function
rich's core is the Console object. Use BBCode-like markup syntax to easily add styles.
Explanation:
Console()creates a console object.console.print()isrich's version of[style]...[/style]isrich's markup syntax for styled text.
2. Beautiful Tables
Creating aligned tables manually in terminals is painful, but rich's Table class makes it effortless.
Explanation:
Table(title="...")creates a titled table.table.add_column(...)defines column headers and styles.table.add_row(...)adds data rows.richhandles alignment and width automatically.
3. Progress Bars
For long-running tasks, progress bars greatly improve user experience.
Explanation:
with Progress() as progress:creates a progress bar context manager.progress.add_task(...)adds a new tracking task.progress.update(task_id, advance=...)updates task progress.
4. Markdown Rendering
Render Markdown text directly in the terminal.
5. Syntax Highlighting
rich provides syntax highlighting for code in multiple languages.
6. Beautiful Tracebacks
When programs error, rich automatically formats error messages for clarity.
from rich.traceback import install

install()

# This code intentionally triggers an error
def faulty_function():
    result = 1 / 0
    return result

faulty_function()
Running this code produces a syntax-highlighted, context-clear, variable-showing error report, dramatically speeding up debugging.
6.4 Summary
rich is a modern, feature-complete, easy-to-use Python library that dramatically improves CLI development experience and end-user visual experience. Whether adding simple colored output or building complex, professional CLI tools, rich is well worth learning.
7. Summary
By combining VS Code/Cursor + uv + Ruff + Pyright + pre-commit + Rich, we can build a fast, standardized modern Python development environment. These tools not only improve code quality but, more importantly, save significant time in daily development, dependency installation, and debugging.
| Capability | Description |
|---|---|
| Unified Toolchain | uv replaces pip + pip-tools + pipx |
| Unified Code Checking | Ruff replaces Black + Flake8 + isort + pyupgrade |
| Extreme Performance | 10–100x faster than traditional tools |
| Type Checking | Pyright provides intelligent type inference |
| Automated Gatekeeper | pre-commit auto-checks before commits |
| Terminal Enhancement | Rich makes CLI output professional |
Source: 【Python/uv】迈向AI的第零步!现代化Python工具指南 (Author: 木乔_Mokio)